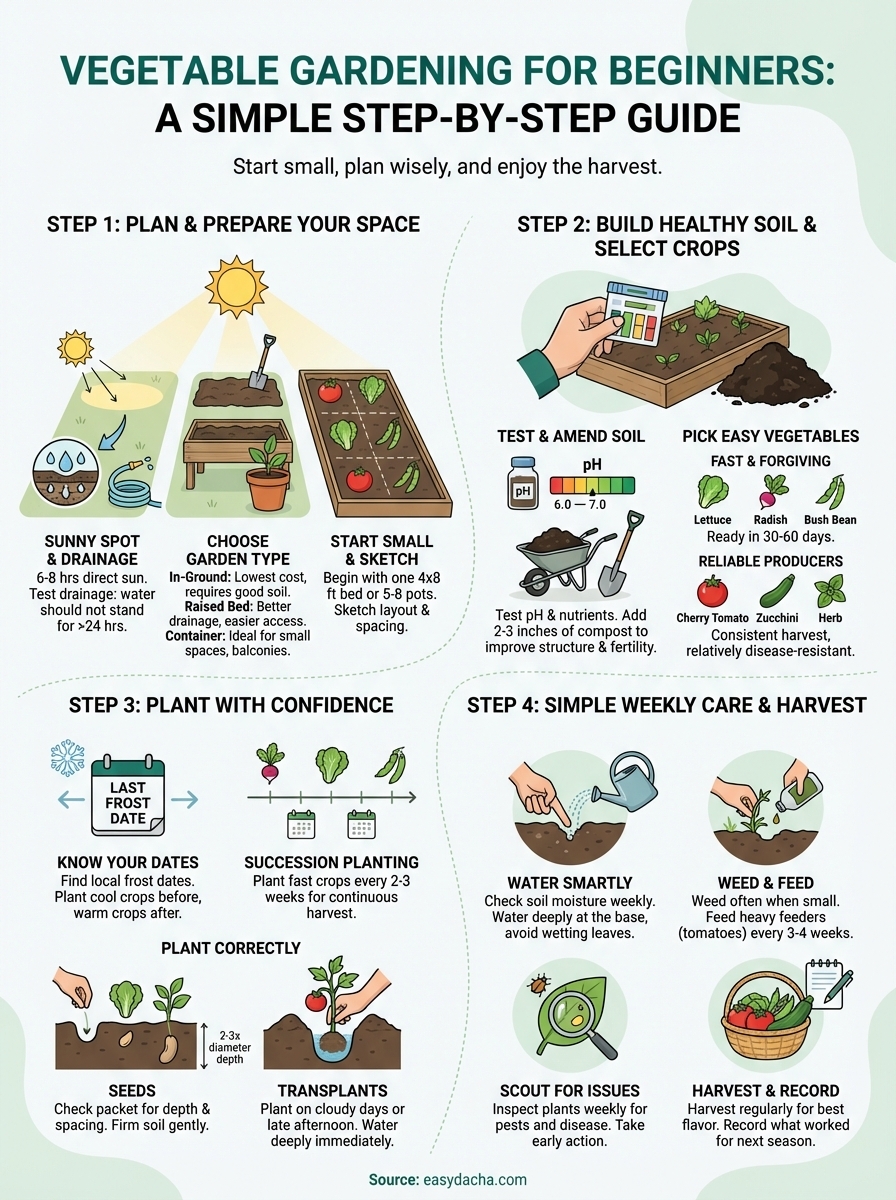
Growing your own vegetables sounds simple enough, until you're standing in front of seed packets wondering where to even begin. Vegetable gardening for beginnerscan feel overwhelming when you're faced with questions about soil types, sunlight requirements, and which plants won't die within the first week.
Here's the good news: you don't need a green thumb to grow food. You need a plan, some basic knowledge, and a willingness to get your hands dirty. This guide breaks down the entire process into manageable steps, from picking the right spot in your yard to harvesting vegetables you actually grew yourself. No gardening degree required.
Whether you have a sprawling backyard or just a sunny corner on your apartment balcony, the core principles remain the same. And as your garden grows, keeping track of what you planted, where you planted it, and what worked becomes increasingly important. That's exactly why we built easyDacha, to give you a simple digital space to organize your garden plans, receive personalized care reminders, and build on your successes season after season.
By the end of this guide, you'll have everything you need to plant your first vegetable garden with confidence.
What you need before you start
You don't need to spend hundreds of dollars or buy every gardening gadget on the market before planting your first seed. Vegetable gardening for beginners starts with a surprisingly short list of essential items and a realistic understanding of what you're getting into. The tools you need fit in a small bucket, and most of the preparation happens in your head, not at the garden center. Before you dig your first hole, take stock of what you already have, what you actually need, and what you can skip until your garden proves it deserves more investment.
Essential tools and supplies
Your first garden needs five basic tools that you'll use repeatedly throughout the growing season. A sturdy trowel lets you dig planting holes and transplant seedlings. A garden fork or spade breaks up soil and mixes in amendments. You'll need a watering can or hose with a gentle spray nozzle to water without washing away seeds. Gardening gloves protect your hands from blisters, thorns, and soil irritation. Finally, keep pruning shears or scissors handy for harvesting and trimming plants as they grow.
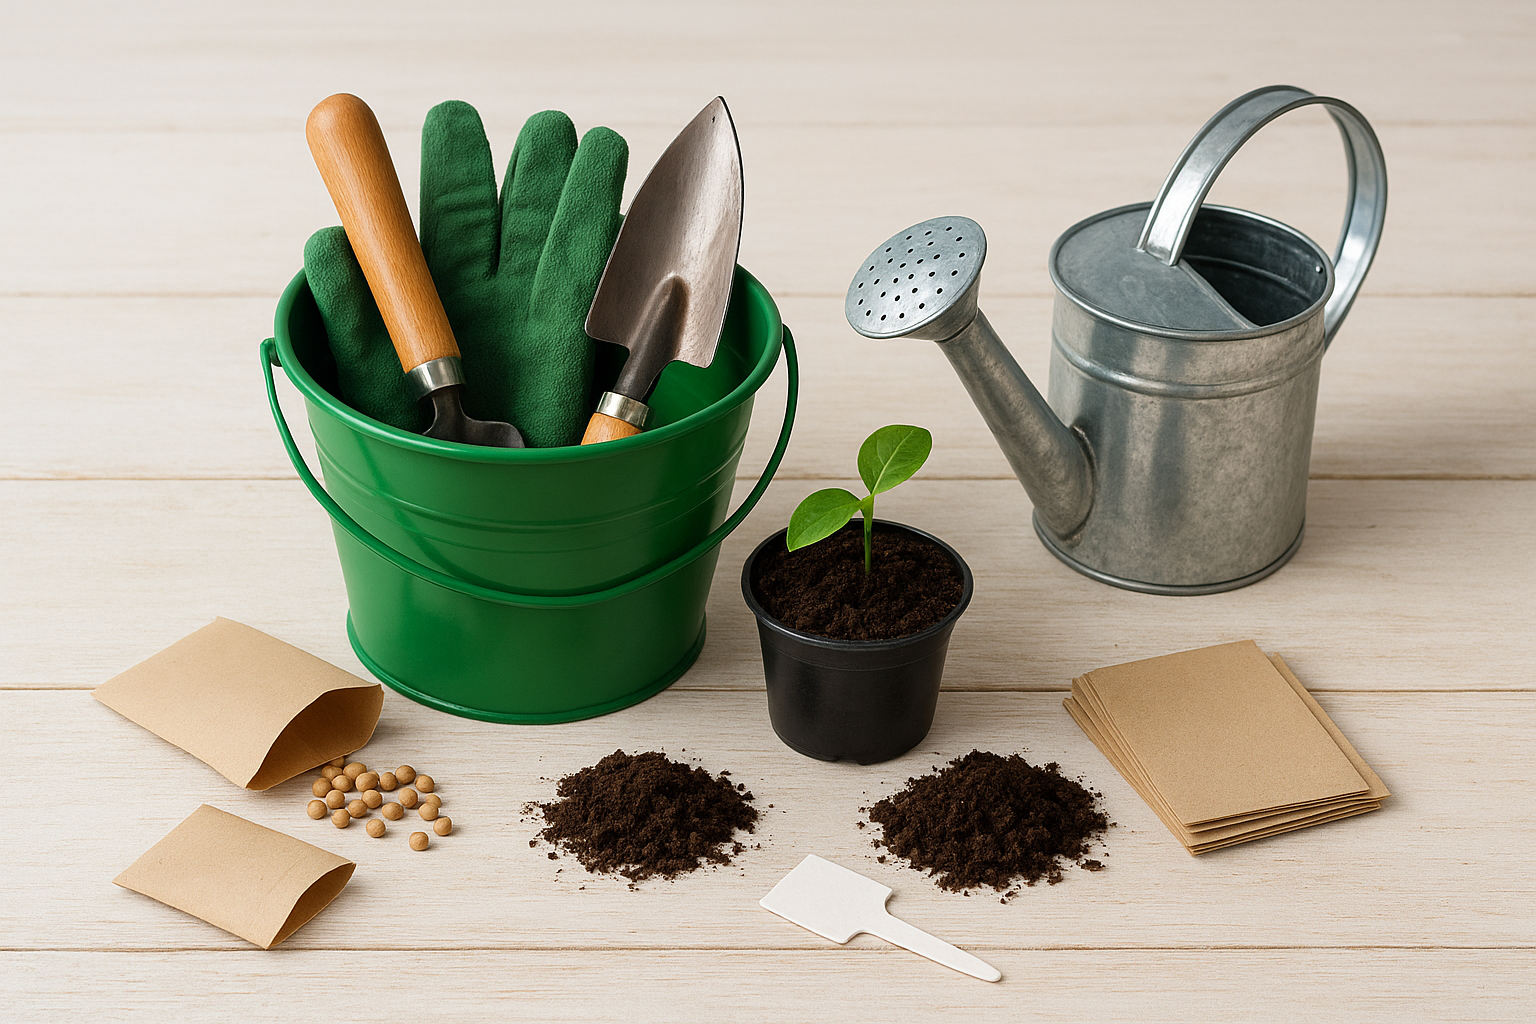
Beyond tools, gather these supplies before planting day:
- Seeds or seedlings for vegetables you've chosen to grow
- Compost or organic matter to improve your soil (2-3 inches for most garden beds)
- Mulch (straw, wood chips, or shredded leaves) to suppress weeds and retain moisture
- All-purpose vegetable fertilizer for supplemental feeding during the season
- Garden stakes, trellises, or cages for plants that need support (tomatoes, beans, cucumbers)
- Garden markers or labels to track what you planted where
- A notebook or app to record planting dates and observations
Most beginners overspend on fancy equipment they never use. Start simple and add specialized tools only when specific problems demand them.
Planning your time commitment
Garden work doesn't happen all at once. You'll invest the most time upfront during site preparation and planting, usually spending 3-5 hours clearing the space, improving soil, and getting seeds or transplants into the ground. After that initial setup, your weekly maintenance averages 1-2 hours depending on garden size. This includes watering (if rain doesn't handle it), weeding, checking for pests, and light pruning.
Different seasons demand different time investments. Spring requires more attention as you start seeds indoors, transplant seedlings, and establish young plants. Summer shifts toward consistent watering, harvesting, and managing faster-growing weeds. Fall gardening often feels less demanding because cooler weather slows both plant growth and weed pressure. Winter gives you time to plan next season, clean tools, and review what worked. Block out 15 minutes daily for quick garden checks during peak growing season, plus a longer session each weekend for deeper maintenance tasks.
Budget expectations
A basic starter garden costs between $50 and $150 for most beginners with a 4x8 foot bed. This covers seeds, soil amendments, basic tools (if you own none), and a few support structures. You can reduce costs significantly by starting with hand-me-down tools, joining seed swaps, or sourcing free compost from municipal programs. Container gardens on balconies often run slightly higher per square foot due to potting soil costs, but the total investment stays lower because you're working with less space.
Expect to spend more in your first year as you acquire reusable items like tools, trellises, and watering equipment. Subsequent seasons drop to mainly seed and amendment costs, typically $20-40 annually for a small garden. Raised bed construction adds $100-300 depending on materials, though you'll use these beds for many years. Seeds remain your cheapest option at $2-4 per packet (enough for dozens of plants), while transplants from nurseries cost $3-6 each but save you 4-6 weeks of growing time. Calculate whether the time saved justifies the extra expense based on your local growing season length.
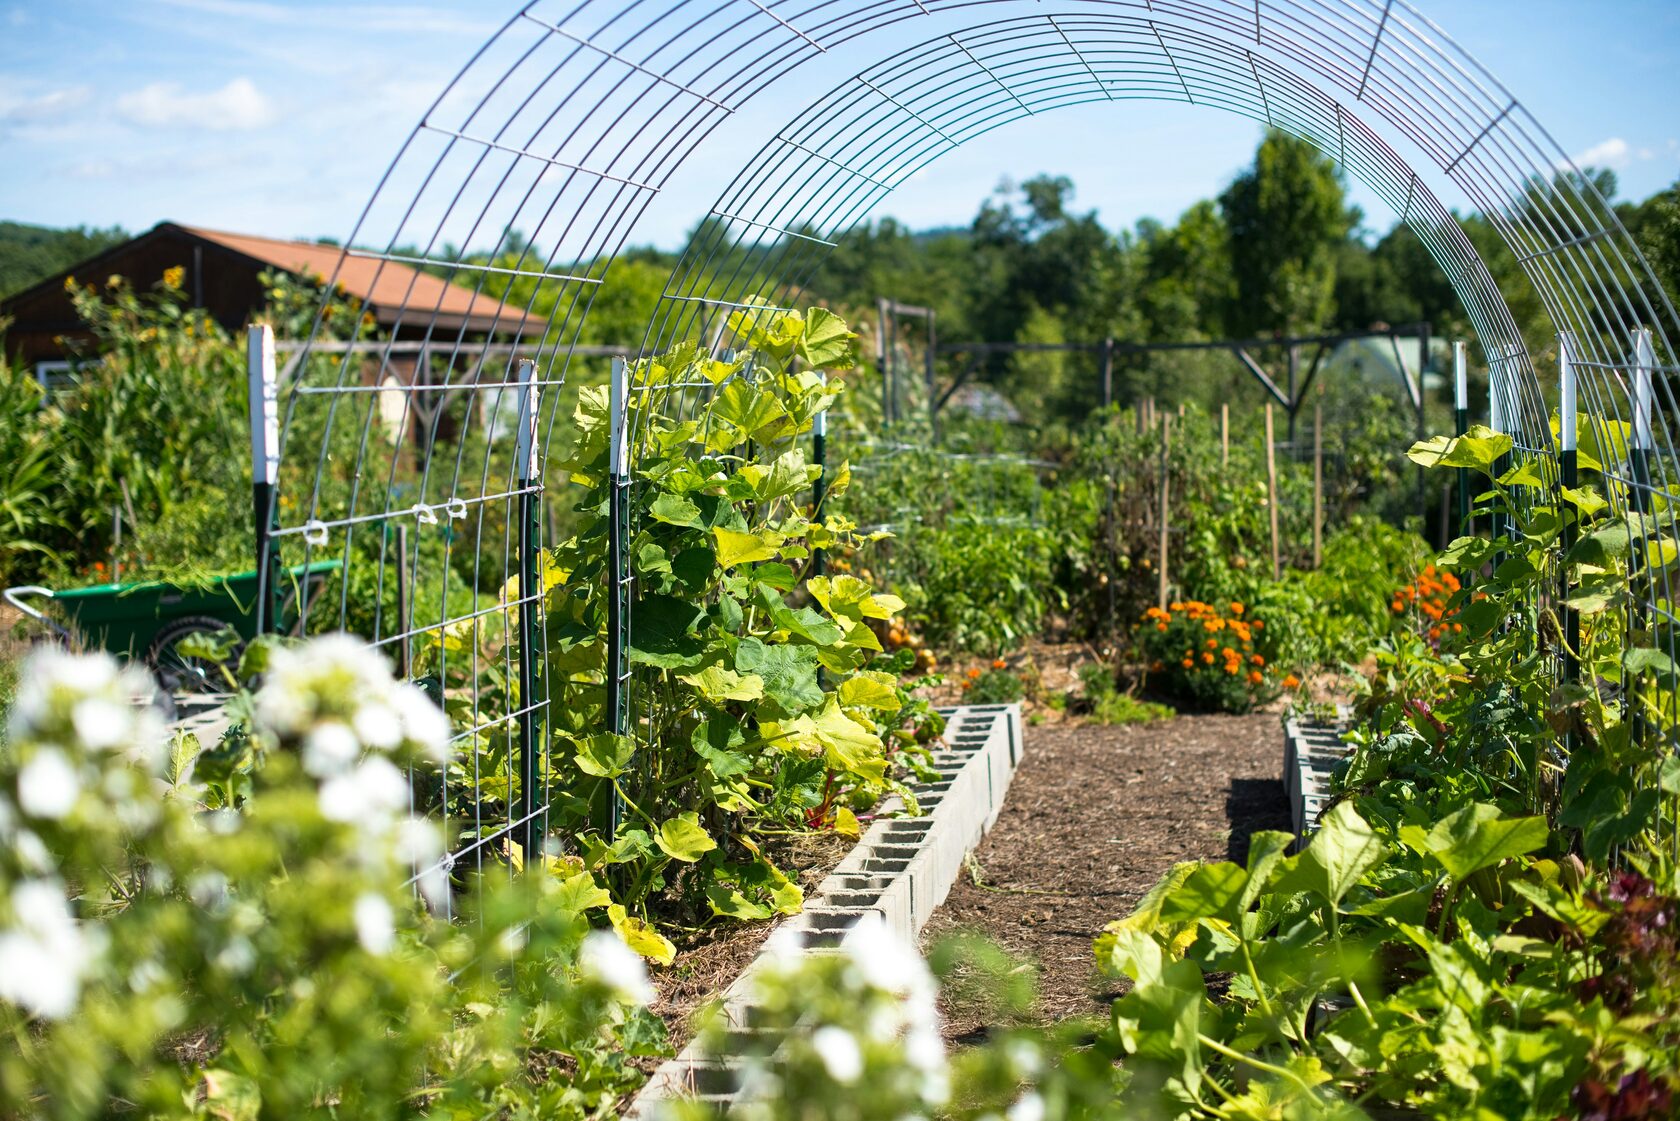
Step 1. Pick the right spot and garden type
Your garden's location determines 80% of your success before you plant a single seed. Vegetable gardening for beginners demands full sun (6-8 hours of direct sunlight daily), level ground or manageable slope, and access to water within hose distance. Walk your property during different times of day to observe light patterns, noting where shadows fall from buildings, fences, and trees. The sunniest spot in your yard at 10 AM might sit in deep shade by 3 PM, and those afternoon hours matter most for heat-loving crops like tomatoes and peppers.
Evaluate sunlight and drainage
Track sunlight exposure on potential garden sites for at least three days before committing to a location. Use your phone to photograph the same spot at 9 AM, noon, 3 PM, and 6 PM, then compare the images. Full sun vegetables need uninterrupted direct light for six hours minimum, preferably during the afternoon when light intensity peaks. Morning sun alone won't cut it for tomatoes, but leafy greens and herbs tolerate partial shade better than fruiting plants.
Test drainage by digging a 12-inch deep hole and filling it with water. If water still stands after 24 hours, your soil drains too slowly for most vegetables. Poor drainage suffocates roots and encourages fungal diseases. You'll need to build raised beds, improve soil structure with organic matter, or choose a different location entirely. Conversely, if water disappears in less than four hours, your soil drains too quickly and you'll fight constant moisture stress. Adding compost helps both extremes by improving water retention in sandy soil and breaking up clay.
The worst garden location features beautiful morning sun but afternoon shade from your neighbor's oak tree. Vegetables need heat, not just light.
Compare garden types for beginners
In-ground gardens cost the least to start but require the best native soil and drainage. You dig directly into existing earth after removing grass and weeds, then amend the top 8-12 inches with compost. This method works well if your soil tests show decent structure and pH, but rocky, clayey, or contaminated soil makes in-ground gardening frustrating. Expect to invest significant time breaking up compacted earth during your first season.
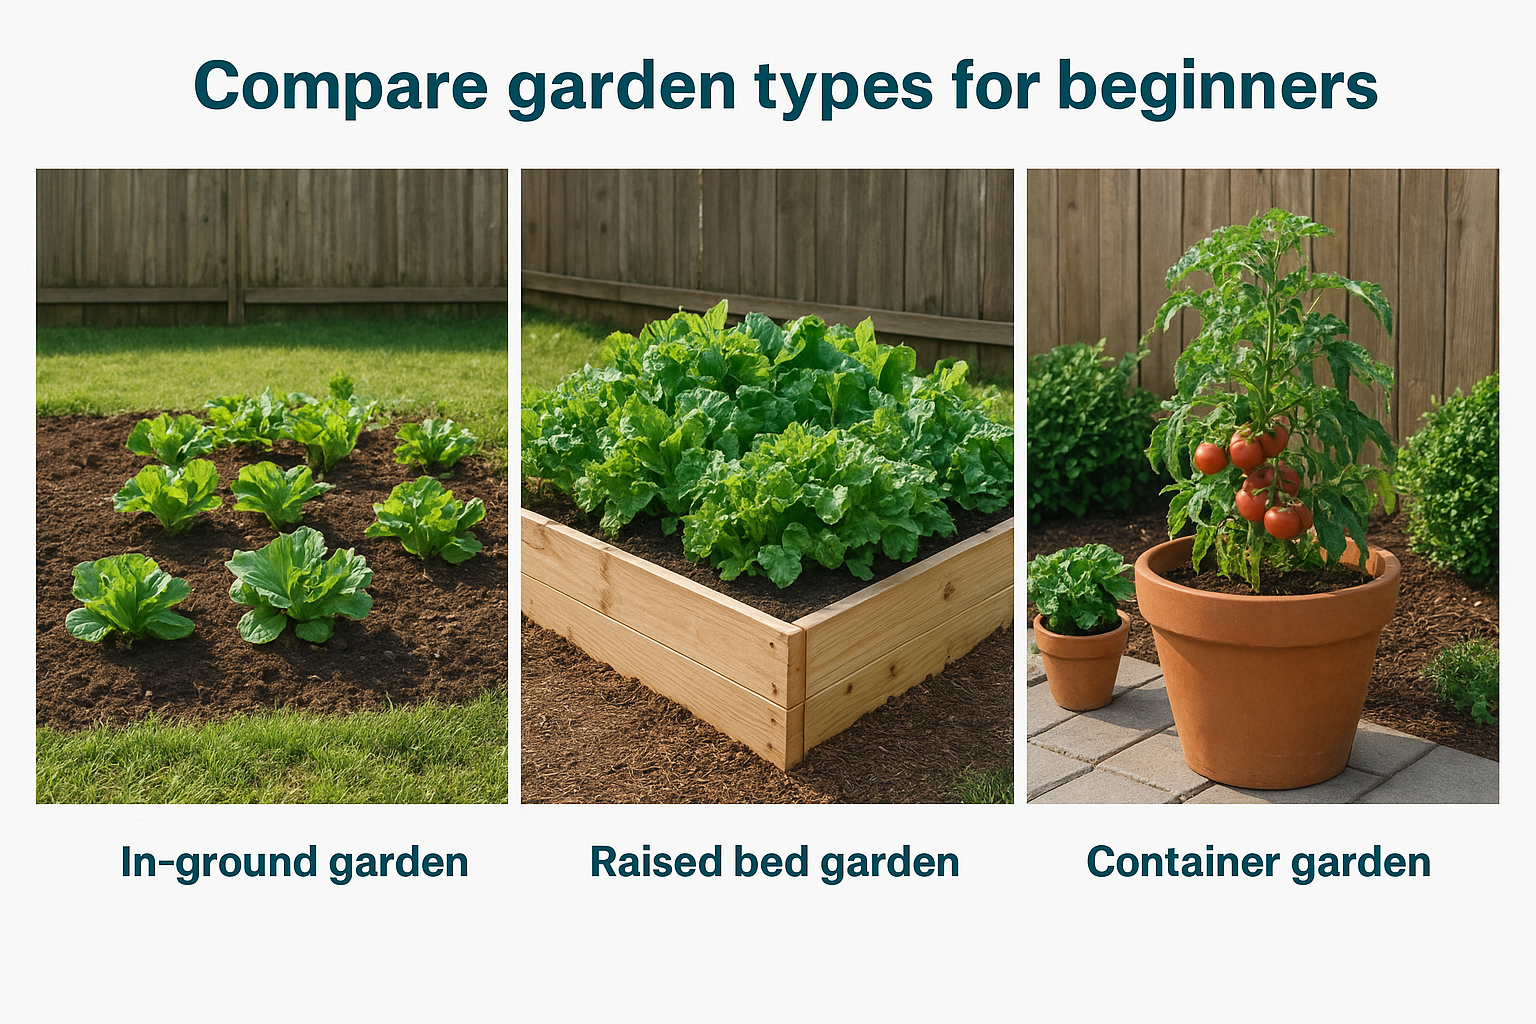
Raised beds solve most soil problems by creating a controlled growing environment above ground level. You build wooden, metal, or stone frames (typically 12-18 inches tall) and fill them with a purchased soil blend mixed with compost. Drainage improves automatically because excess water flows through and away from roots. Raised beds warm up faster in spring, stay loose and easy to work, and keep walking paths separate from growing space. The upfront cost runs higher, but maintenance drops significantly compared to in-ground plots.
Container gardens fit smallest spaces like balconies, patios, or sunny windowsills. Each plant grows in its own pot, giving you complete control over soil quality and placement. Containers need more frequent watering than beds because limited soil dries out quickly, and you'll replace or heavily amend potting mix each season. Choose pots at least 12 inches deep for most vegetables, bigger for tomatoes and peppers. This approach lets renters garden without permanent installations and makes moving plants to follow sun patterns possible.
Step 2. Choose a beginner-friendly size and layout
Starting too big remains the most common mistake in vegetable gardening for beginners. You see professional gardens spanning hundreds of square feet and think you need similar space to grow meaningful harvests. Reality hits differently. A 100-square-foot garden (roughly 10x10 feet) overwhelms first-time growers with weeding, watering, and maintenance demands that consume weekends and crush enthusiasm by mid-July. Size your first garden based on time available, not space available, and you'll actually enjoy the process enough to expand next season.
Start with manageable dimensions
Begin with a 4x8 foot bed (32 square feet) for your first season. This single bed produces enough vegetables for regular fresh eating without requiring more than 30 minutes of weekly maintenance once established. You can reach the center from either side without stepping on soil, and the contained space makes crop rotation planning simple when you expand later. Two 4x8 beds work well if you have help or previous experience with flower gardens, but resist the urge to build four beds just because you have room.
Container gardeners should start with 5-8 large pots (5-gallon minimum) rather than filling an entire balcony with plants. Each container needs individual watering and fertilizing, and managing twenty pots becomes a daily chore that feels more like work than hobby. Focus your effort on fewer plants that actually thrive instead of barely keeping dozens alive.
Starting small and succeeding beats starting big and quitting by August. You can always expand, but you can't get back time spent maintaining an overwhelming garden.
Design for easy access
Position beds and containers where you can reach every plant without awkward stretching or stepping on growing areas. Leave at least 2 feet of walking spacebetween beds if you're building multiple raised beds. This clearance lets you move a wheelbarrow through, kneel comfortably for harvest, and access plants from both sides without compacting soil in adjacent beds. Narrow the bed width to 3-4 feet if you can only access one side (against a fence or wall).
Plan pathways using materials that suppress weeds but allow water drainage. Wood chips, straw, or landscape fabric covered with gravel all work better than bare soil that turns muddy after rain. Permanent gardens benefit from defined paths that stay consistent year after year, making it easier to track planting patterns and rotate crops systematically.
Map your layout before planting
Draw a simple overhead sketch showing bed dimensions, plant spacing, and which vegetables go where. Use this template format:
4x8 Bed Example (spacing in inches)
North End:
- Tomatoes (24" apart) + Basil (12" apart) between
Middle Section:
- Bush beans (4" apart, 2 rows 18" between)
South End:
- Lettuce (6" apart) + Radishes (2" apart) interplanted
This map becomes your reference throughout the season and helps you remember what worked when planning next year. Label each plant location with expected harvest dates based on seed packet information so you know when to expect results and when space opens up for succession plantings.
Step 3. Build healthy soil the simple way
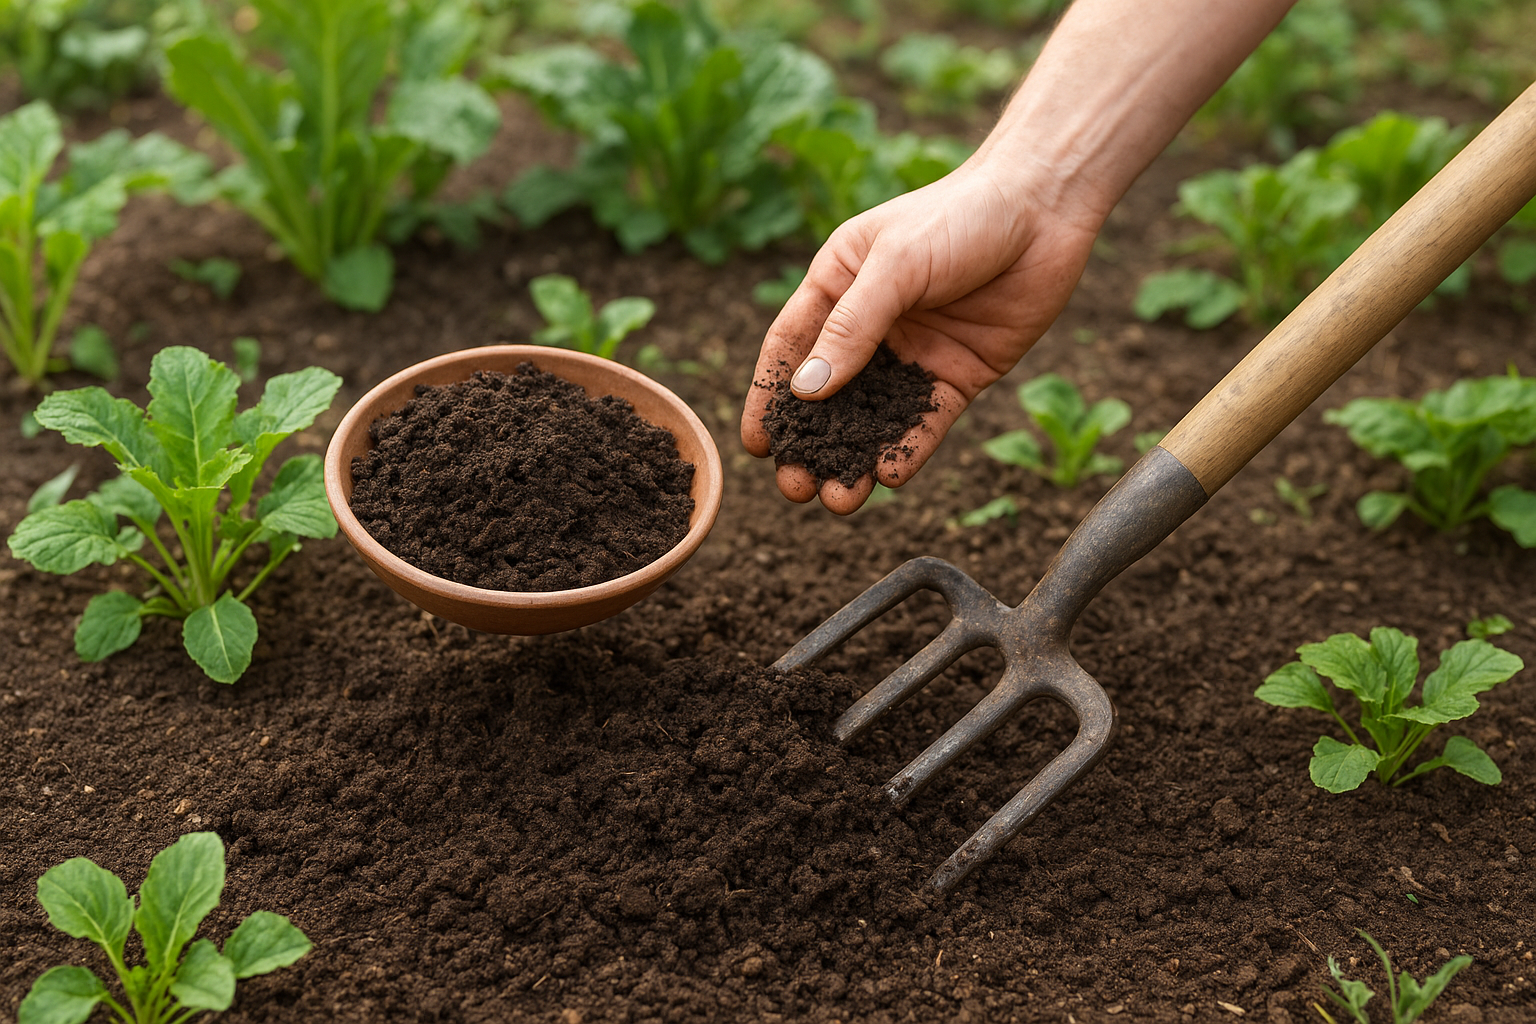
Good soil makes vegetable gardening for beginners actually feel easy. Plants pull nutrients from soil constantly, and depleted earth produces weak, disease-prone vegetables regardless of watering schedule or sunlight exposure. You don't need a chemistry degree to build healthy soil, but you do need to address three core factors: organic matter content, nutrient availability, and pH balance. Skip the expensive amendments marketed at garden centers until you understand what your specific soil actually lacks.
Test your soil first
Order a basic soil test kit from your local extension office (typically $10-20) or use a home test kit from hardware stores. The test reveals pH level, nitrogen, phosphorus, and potassium levels, plus recommendations for amendments based on what you plan to grow. Collect soil samples from multiple spots in your garden area, mixing them together in a clean bucket before submitting. Take samples from the top 6 inches where roots feed most actively.
Wait for results before buying amendments. Random guessing wastes money and potentially harms plants. For example, adding lime to raise pH in already alkaline soil creates conditions where plants can't access iron, causing yellowing leaves despite healthy roots. Test results typically arrive within two weeks and remain valid for 2-3 years unless you make major amendments.
Add organic matter correctly
Spread 2-3 inches of finished compost across your entire planting area before the first season. Finished compost looks dark and crumbly, smells earthy (not rotten), and contains no recognizable food scraps or plant pieces. Work this compost into the top 6-8 inches of soil using a garden fork, breaking up clumps and mixing thoroughly. This single application transforms soil structure, improving both drainage and water retention simultaneously.
Continue adding compost annually by spreading 1 inch each spring as maintenance. You can also side-dress growing plants with compost during the season by sprinkling a thin layer around the base of each plant and watering it in. Organic matter feeds beneficial soil organisms that break down nutrients into forms plant roots can absorb, creating a living system that becomes more productive each year.
Compost solves most soil problems over time. Clay soil drains better, sandy soil holds moisture longer, and plants access nutrients more efficiently.
Balance pH without overthinking it
Most vegetables thrive in slightly acidic to neutral soil between 6.0 and 7.0 pH. If your test shows pH outside this range, adjust it gradually using recommended amounts from your soil test results. Sulfur lowers pH in alkaline soils (above 7.5), while ground limestone raises pH in acidic soils (below 5.5). Apply amendments in fall so they have winter to integrate before spring planting.
Avoid making dramatic pH shifts in a single season. Changes exceeding 0.5 pH points per year can stress beneficial microorganisms and temporarily lock up nutrients. Make small adjustments, test again next season, and correct further if needed. Many vegetables tolerate wider pH ranges than books suggest, so focus on staying within the 5.5-7.5 range rather than hitting exact numbers.
Step 4. Pick easy vegetables that fit your life
Choosing the right vegetables determines whether vegetable gardening for beginners feels rewarding or frustrating. You need plants that tolerate mistakes, produce quickly enough to maintain motivation, and actually get eaten by your household. Growing vegetables you'll never cook wastes garden space and effort, while selecting crops that demand daily attention sets you up for failure if you travel for work or lose interest during busy periods. Match your plant selections to your actual lifestyle, not the idealized version where you spend every evening in the garden.
Match vegetables to your schedule
Fast-growing crops like radishes, lettuce, and bush beans produce harvests within 30-60 days and work perfectly if you need quick results to stay engaged. These vegetables also tolerate less-than-perfect care and forgive watering inconsistencies better than finicky plants. Slow-maturing vegetables like tomatoes, peppers, and winter squash require 70-120 days from planting to harvest but need less frequent intervention once established. They suit gardeners who can dedicate time to initial setup but prefer weekly maintenance over daily monitoring.
Consider how often you're actually home during peak growing season. Frequent travelers should focus on drought-tolerant options like established tomato plants, herbs, and root vegetables that survive a week without water. Daily gardeners can handle lettuce, spinach, and cucumbers that wilt quickly when thirsty. Weekend warriors do well with resilient mid-range crops like beans, carrots, and summer squash that need attention twice weekly but don't collapse from brief neglect.
Start with proven beginner crops
These vegetables consistently succeed for first-time growers across different climates and soil types:
- Lettuce and salad greens: Grow in 30-45 days, tolerate partial shade, thrive in containers
- Radishes: Mature in 25-30 days, mark rows for slower seeds, break up soil
- Bush beans: Produce heavily in 50-60 days, fix nitrogen for other plants
- Cherry tomatoes: More disease-resistant than large tomatoes, continuous harvest
- Zucchini/summer squash: One plant produces enough for a family, grows fast
- Herbs (basil, cilantro, parsley): Essential for cooking, expensive at stores, nearly foolproof
Plant at least three items from this list in your first garden. Each one teaches different skills while providing edible results even if you make mistakes along the way.
Start with vegetables you already buy weekly at grocery stores. Growing food you don't eat teaches nothing except how to waste garden space.
Avoid common beginner traps
Skip corn, melons, and winter squash in your first season regardless of available space. These crops demand significant room (25-50 square feet per plant), produce relatively small harvests, and require perfect timing that beginners struggle to nail. Cauliflower and Brussels sprouts challenge even experienced gardeners with their sensitivity to temperature fluctuations and pest pressure. Save specialty vegetables like artichokes or okra until you've mastered basics with forgiving crops. Heirloom tomatoes sound romantic but modern disease-resistant hybrids actually taste excellent while surviving conditions that kill heritage varieties.
Step 5. Plan planting dates and succession planting
Timing separates successful harvests from disappointing failures in vegetable gardening for beginners. You can prep perfect soil, choose ideal vegetables, and water consistently, but planting two weeks too early kills frost-sensitive crops overnight. Planting too late means tomatoes still hang green when fall frost arrives. Beyond initial timing, most beginners plant everything at once and wonder why they're drowning in zucchini for two weeks then eating nothing for six weeks. Strategic succession planting solves both problems by spreading plantings across the growing season for continuous harvests from spring through fall.
Find your frost dates and planting windows
Your last spring frost date and first fall frost date create boundaries for your growing season. Search "average last frost date [your zip code]" to find this information from university extension services or USDA resources. These dates represent averages over decades, meaning actual frost could arrive two weeks earlier or later in any given year. Count backwards from your last spring frost using "days to maturity" from seed packets to determine earliest safe planting dates for each vegetable.
Use this simple formula for spring planting:
Frost-Tolerant Crops (lettuce, peas, radishes, spinach)
- Plant 4-6 weeks BEFORE last frost date
Frost-Sensitive Crops (tomatoes, peppers, squash, beans)
- Plant 1-2 weeks AFTER last frost date when soil reaches 60°F
Heat-Loving Crops (melons, eggplant, okra)
- Plant 3-4 weeks AFTER last frost date when nights stay above 55°F
Check soil temperature with an inexpensive soil thermometer (under $10) rather than guessing based on air temperature. Cold soil rots seeds before they germinate regardless of frost risk.
Planting by calendar dates instead of actual conditions kills more gardens than any pest or disease.
Schedule successive plantings for continuous harvest
Plant fast-maturing crops like lettuce, radishes, and bush beans every 2-3 weeks from spring through late summer for continuous harvests. This prevents the feast-or-famine cycle where everything ripens simultaneously then nothing produces for weeks. Write planting dates directly on seed packets using this succession schedule template:
Lettuce Succession Plan:
First planting: April 1 (last frost: April 15)
Second planting: April 21
Third planting: May 12
Fourth planting: June 2
Fifth planting: August 1 (fall crop)
Harvest begins: 45 days after each planting
Stop succession planting 60-90 days before your first fall frost for crops needing warm weather. Calculate backwards from fall frost using days to maturity plus two weeks buffer. Cool-season crops like lettuce and carrots can handle light frost, so plant final successions 45-50 days before expected frost.
Track plantings in one place
Create a simple planting log showing what went where and when. This prevents mistakes like replanting tomatoes in the same spot next season (which concentrates disease) and helps you remember what actually worked. Record these details each time you plant:
- Date planted
- Vegetable variety and seed source
- Location in garden (bed number, row, container)
- Expected harvest date
- Actual first harvest date
- Notes on performance
Digital tools like easyDacha automate this tracking and send reminders for succession plantings based on your specific frost dates and chosen vegetables, eliminating the mental load of calculating dates manually.
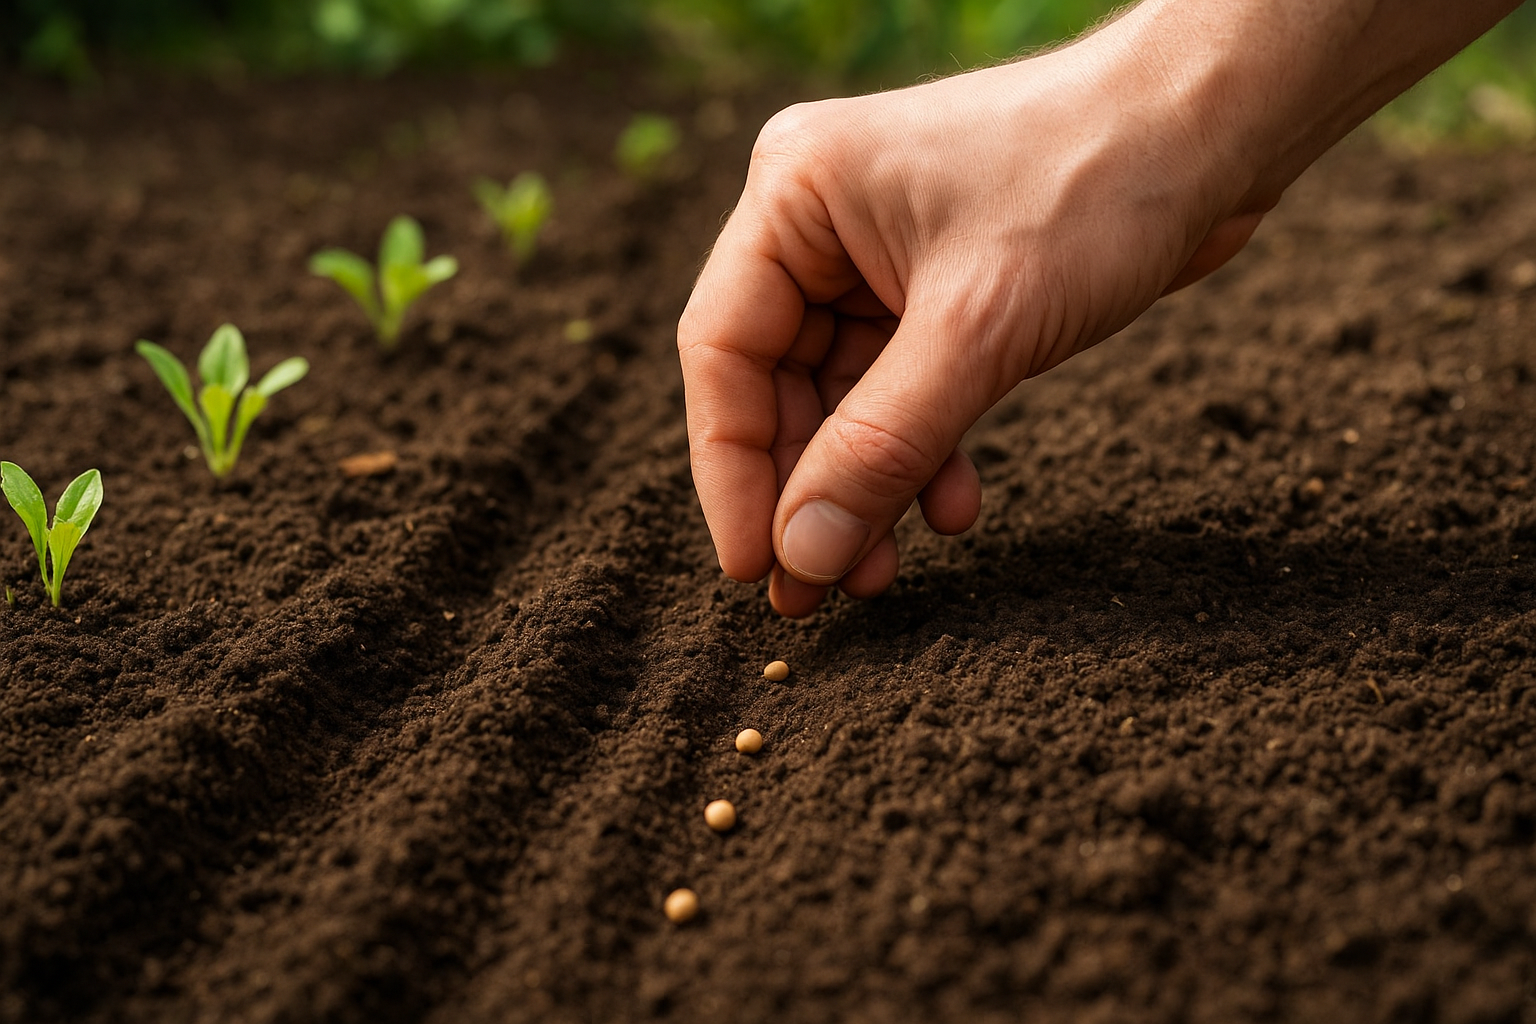
Step 6. Plant seeds and transplants correctly
Proper planting technique separates seeds that germinate reliably from those that rot in soil or produce weak, stunted plants. Vegetable gardening for beginners trips up at this step more than any other because seed packets provide minimal guidance and transplant timing feels arbitrary. You need to understand planting depth, spacing, and post-planting care specific to whether you're working with seeds or nursery transplants. These fundamentals determine whether your carefully prepared bed produces thriving plants or disappointing failures.
Plant seeds at the right depth
Most seeds need planting at a depth two to three times their diameter. Tiny lettuce or carrot seeds barely get covered with 1/4 inch of soil, while larger bean seeds go down 1-2 inches deep. Plant too shallow and seeds dry out before germinating. Plant too deep and seedlings exhaust their energy trying to reach sunlight, emerging weak or not at all.
Use this depth reference for common vegetables:
VegetablePlanting DepthSpacing Between Seeds
Lettuce, carrots
1/4 inch
1-2 inches
Radishes, beets
1/2 inch
2 inches
Beans, peas
1-1.5 inches
3-4 inches
Cucumber, squash
1 inch
12-18 inches
Tomatoes (seed)
1/4 inch
N/A (transplant)
Firm soil gently over seeds after planting to ensure good seed-to-soil contactwithout creating a crusty surface that blocks emerging seedlings. Mark rows immediately with labels showing variety and planting date.
Transplant seedlings without shock
Move transplants into the garden during late afternoon or on cloudy days to reduce transplant shock from intense sun. Dig holes slightly larger than root balls, then fill with water and let it drain completely before placing plants. This pre-watering ensures roots contact moist soil immediately without creating air pockets.
Remove transplants from containers by squeezing sides gently and supporting the stem base as you lift. Never pull plants out by stems, which damages roots and stunts growth. Set plants at the same depth they grew in containers except tomatoes, which benefit from deeper planting up to the first set of true leaves. Bury part of the stem to encourage additional root development.
Transplanting during midday heat stresses plants unnecessarily and reduces survival rates by 30-40% compared to evening planting.
Water immediately after planting
Water seeds gently using a fine spray or misting nozzle that won't wash them out of position or bury them deeper than intended. Keep soil consistently moist (not soggy) until seedlings emerge, checking daily and watering whenever the top 1/2 inch feels dry. Transplants need deeper watering to settle soil around roots and eliminate air gaps. Apply one gallon per plant slowly, letting water soak down rather than running off.
Continue daily watering for the first week after transplanting until roots establish and plants show new growth.
Step 7. Follow a simple weekly care routine
Consistent garden maintenance prevents small problems from becoming crop-destroying disasters. Vegetable gardening for beginners succeeds when you establish a predictable care rhythm that catches issues early while they're still fixable. You don't need daily garden visits during most of the season, but weekly check-inskeep plants healthy and productive without consuming your entire weekend. This routine takes 30-45 minutes once you develop efficiency, and the time investment pays back in healthier plants and bigger harvests.
Check soil moisture before watering
Stick your finger 2 inches into the soil near plant roots to test moisture levels rather than watering on a fixed schedule. Dry soil at this depth signals time to water, while dampness means you can skip another day or two. Most vegetables need 1-1.5 inches of water weekly from rain or irrigation combined, measured using a rain gauge or empty tuna can placed in the garden. Water deeply once or twice weekly instead of lightly every day, which encourages shallow root systems vulnerable to drought stress.
Apply water directly to soil at the plant base using drip irrigation or soaker hoseswhen possible. Overhead watering wets foliage and promotes fungal diseases, wastes water through evaporation, and doesn't penetrate soil as effectively as ground-level watering. Water during morning hours so leaves dry before evening, reducing disease risk when you must use overhead sprinklers.
Weed when seedlings are tiny
Pull weeds every 7-10 days while they're small and roots haven't established deeply. Young weeds come out with minimal soil disturbance compared to mature plants with extensive root systems. Focus on weeding within 6 inches of vegetable plantswhere competition for nutrients and water hits hardest. Weeds growing in pathways matter less unless they're going to seed and spreading throughout the garden.
Mulch suppresses most weeds before they start. Refresh mulch layers when bare soil becomes visible, maintaining 2-3 inches of coverage around plants but keeping mulch pulled back from direct contact with stems to prevent rot.
Spending 10 minutes pulling small weeds weekly beats spending 3 hours fighting established weeds monthly.
Scout for pests and disease weekly
Walk your garden examining both sides of leaves for insect damage, eggs, or disease spots. Early detection lets you remove affected leaves, handpick pests, or apply targeted treatments before problems spread. Check under leaves where pests hide from sun and predators. Look for yellowing, holes, wilting, or discoloration that indicates trouble beyond normal growth patterns.
Keep notes on what you find using this template:
Weekly Garden Check: [Date]
- Tomatoes: Small holes in leaves (likely flea beetles)
- Beans: Healthy, flowering started
- Lettuce: Slight yellowing on lower leaves (add nitrogen)
- Action taken: Removed damaged tomato leaves, side-dressed lettuce with compost
Feed plants during active growth
Apply liquid fertilizer or compost tea every 3-4 weeks to heavy feeders like tomatoes, peppers, squash, and corn once they start flowering and setting fruit. Light feeders including beans, peas, and root vegetables need minimal supplemental feeding if you started with good soil. Follow package directions for dilution rates, erring on the side of less rather than more concentrated solutions that burn roots.
Step 8. Harvest, store, and learn for next season
Knowing when and how to harvest determines whether vegetables taste incredible or bland and tough. Vegetable gardening for beginners often stumbles at this final step because harvest timing varies dramatically between crops and proper storage extends shelf life from days to months. You also need a system for tracking what succeeded this season so you can replicate results and avoid repeating mistakes next year. The effort you invested in planning, planting, and maintaining pays off when you harvest at peak ripeness and preserve that quality through proper handling.
Know when vegetables are actually ripe
Harvest most vegetables slightly before full maturity rather than waiting until they're oversized and past prime. Lettuce tastes best at 4-6 inches tall before heat causes bitterness. Zucchini should measure 6-8 inches long when skin still feels tender to a fingernail, not baseball-bat sized and woody. Cherry tomatoes need full color development but give slightly when squeezed gently. Beans snap cleanly when bent if picked at proper size, while overripe beans feel tough and stringy.
Check plants every 2-3 days once harvesting begins because vegetables mature quickly during warm weather. Use these harvest indicators for common crops:
VegetableHarvest WhenCheck Frequency
Lettuce
4-6 inches, before bolting
Every 3 days
Tomatoes
Fully colored, slight give
Every 2 days
Beans
Pods firm, seeds small
Every 2-3 days
Zucchini
6-8 inches long
Daily
Radishes
1 inch diameter at soil line
Every 3 days
Harvest during cool morning hours when plants hold maximum moisture and sugars haven't converted to starches from afternoon heat.
Picking vegetables at their peak window makes the difference between grocery store quality and restaurant-quality produce.
Store harvests to extend shelf life
Handle vegetables gently to avoid bruising that accelerates spoilage. Wash only what you'll use immediately rather than washing entire harvests, as excess moisture promotes rot during storage. Root vegetables like carrots and radishes store best with tops removed since greens continue drawing moisture from roots. Store these in plastic bags with small holes in the refrigerator crisper drawer where they'll last 2-4 weeks.
Tomatoes stay on the counter at room temperature until fully ripe, then move to the refrigerator if you can't eat them within two days. Leafy greens need washing, thorough drying, and storage in containers lined with paper towels to absorb condensation. Herbs last longest standing upright in water like flowers, loosely covered with a plastic bag.
Document what worked for next season
Create a season-end summary recording successes, failures, and specific observations while details remain fresh. Note which varieties produced best, where pest pressure hit hardest, and what planting dates worked. Record this information in a simple template:
Season Summary: [Year]
Best performers: Cherry tomatoes (variety: Sungold), bush beans
Disappointments: Cucumbers (too much shade), late lettuce (bolted fast)
Pest issues: Flea beetles on tomatoes, minimal damage
What to change: Start succession plantings 2 weeks earlier, add trellis for beans
Space opened: [Date] beans finished, replanted with fall lettuce
Notes: Tomatoes needed more calcium (blossom end rot on 3 plants)
Take photos of your garden layout at peak season showing plant positions and spacing that worked. These images help you remember successful arrangements when planning next season's layout months later.
A simple wrap-up to get you growing
You now have everything you need to start your first vegetable garden successfully. Pick your sunniest spot, start with a manageable 4x8 bed or a few containers, and choose vegetables that actually fit your schedule and eating habits. Test your soil, add compost, and plant at the right time based on your local frost dates. The weekly maintenance routine keeps plants healthy without consuming your life.
Vegetable gardening for beginners gets easier each season as you build on what worked and skip what didn't. Track your plantings, harvest dates, and observations so next year starts from knowledge instead of guesswork. Let easyDacha handle the planning and reminders while you focus on the hands-on work that actually matters. Your garden plan, planting schedule, and care reminders all sync across devices so you never miss critical tasks or forget what grew where.
Start small this season, succeed with a few crops, and expand from there.